
Introduction
A properly functioning saxophone reed is essential for a successful performance. In addition, possessing several good reeds can boost confidence and motivate saxophonists to perform at their highest level. Likewise, not having an assortment of playable reeds can cause performers much anxiety, a loss of concentration and preoccupy their thoughts, preventing them from focusing on other important musical aspects of performance. To ensure that good reeds are always available for a performance, it is suggested that saxophonists practice reed preparation and adjustment strategies that will assist them in producing a storehouse of playable reeds ready for use.
Reed Preparation Strategies
Reed preparation is a process that transforms newly purchased reeds into reeds that are ready for performance. Since reeds are mass-produced in factories by machines that cut the cane very quickly, there can be much disparity in the playability of individual reeds. The reed preparation process addresses this problem and several other issues saxophonists may encounter when performing on new reeds. Three reed preparation strategies that consistently produce playable reeds are (1) the reed breaking in process, (2) the reed adjustment process and (3) the reed sealing test.
Breaking in Reeds
After new reeds have been purchased, the first step in preparing them for performance is the breaking in process. This procedure is very important to the consistency, playability and longevity of the reed. Breaking in a reed refers to the process of playing a new reed for short periods of time each day, gradually allowing the cane to acclimate to temperature, humidity and to the routine of getting wet and drying out. By completing the breaking in process, the cane of the reed will not be damaged in the initial stages of playing allowing the reed to perform better, play more consistently and last longer.
The initial step in the breaking in process is to place the reeds in a bowl of lukewarm water for around four minutes to allow them time to absorb some water. Saxophonists should make sure the entire reed is submerged in water, not just the tip.
Next the reed is removed from the water and placed on the mouthpiece. During this stage of reed preparation, the reed should only be played for around three minutes at a medium soft dynamic level. Saxophonists should avoid playing in the extreme registers of the instrument or using any hard articulations at this time.
After completing this step, the reed should be removed from the mouthpiece and placed in a reed case that contains a hard, flat surface for the reed to dry on. It is also recommended that the reed case contain some type of humidity control system so the reed does not completely dry out.
Saxophonists should perform this entire process for an additional four days gradually increasing the amount of playing time each day by one minute. The dynamic level up can also be increased up to a forte level while working towards the extreme ranges of the instrument, both low and high. After playing each day, the reed should be placed back into the reed storage case allowing it to dry until the next day. After five days, the reed should be broken in and can be played normally.
Adjusting Reeds
After completing the breaking in process, there may be some reeds that do not play correctly. One might expect that a new reed would play perfectly but this is usually not the case. In fact, out of a box of ten reeds, only a few reeds may play flawlessly, with no work needed. The other reeds, which could be too hard, too soft, not balanced properly or swollen, may have the potential to become good reeds with some adjustment. At this point, some saxophonists, who do not wish to work with reeds, may throw them away. However, with a little work, most reeds can be adjusted allowing them to be used for practice sessions, rehearsals and even performances. Since reeds are somewhat expensive, it is well worth a saxophonist’s time and effort to learn how to adjust them.
Parts of the Reed
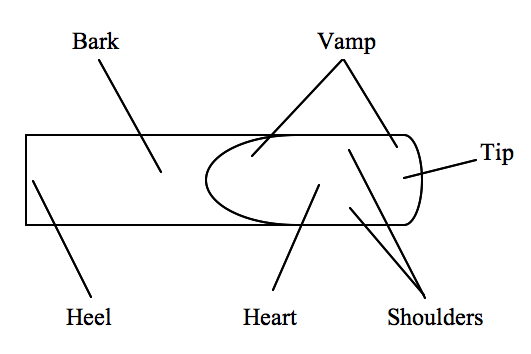
In order to properly adjust a reed, saxophonists must first learn the parts of a reed, which are illustrated in the diagram below. The tip of a reed is the thinnest part and comes into direct contact with the saxophonist’s tongue when articulating. The tip is very delicate and should never be touched by the performer as it can be easily damaged. The vamp is the shaved portion of the reed that stretches from the tip to approximately halfway through the reed. The heart is located in the center of the vamp and is surrounded on both sides by the shoulders of the reed. The area below the vamp is not shaven and covered with cane bark. The heel of the reed is the end opposite of the tip and is where the saxophonist can safely hold the reed without damaging it.
Reed Adjustment
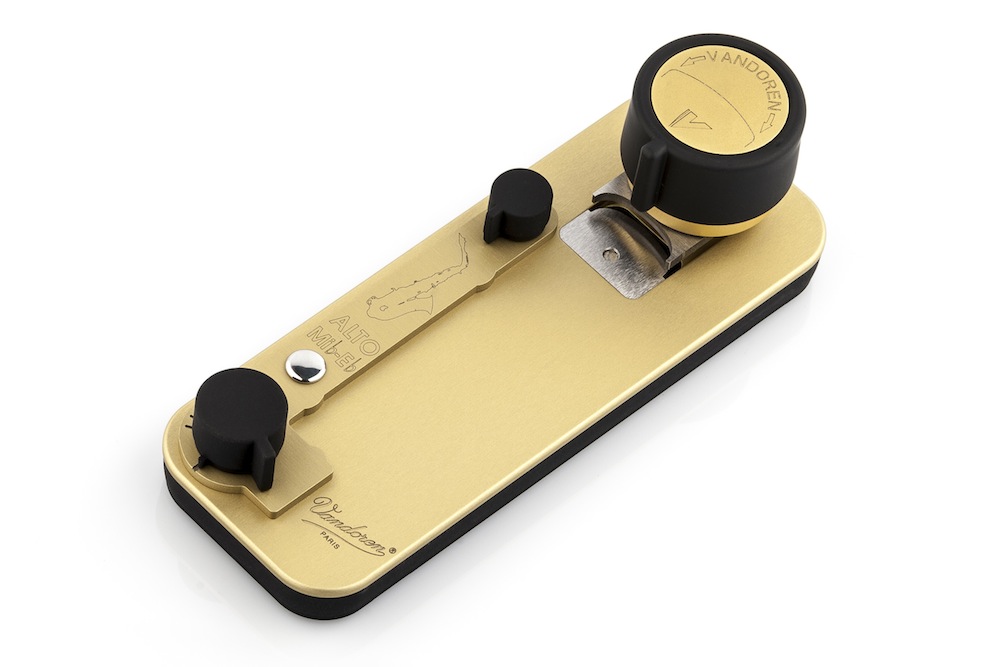
If a reed is too soft or too hard, adjustments may be made through either clipping or sanding the cane. Reeds that are too soft may be clipped using a reed trimmer to make them harder. Reed trimmers, which can be purchased at many music stores, work by removing the softer, thinner cane at the reed tip by clipping it off. This makes the reed tip thicker resulting in a harder reed. Cordier, Rigotti and Vandoren are several companies that manufacture reed trimmers in a variety of styles and prices.
When clipping reeds, saxophonists should not to remove too much of the tip at once since the removal of the smallest amount of cane will make a big difference in how the reed performs. After the reed has been clipped, it should be test played to determine if any further work is necessary. If the reed is still too soft, an additional clipping may be necessary.
Reeds that are too hard may be sanded on their flat side with fine grit sandpaper to make them softer. This process involves placing the sandpaper on a flat surface with the rough side facing up. The flat side of the reed is then slide back and forth against the sandpaper to remove small portions on cane over the entire flat surface of the reed. By removing cane, the reed is made thinner and softer.
When sanding a reed, saxophonists should only remove a small portion of cane at a time before test playing since the removal of a little cane will greatly affect how the reed plays. Removing small amounts of cane throughout the reed will produce a softer, more playable reed.
Balancing Reeds
Reeds that are not balanced properly will also need to be adjusted. In a balanced reed, both shoulders of the reed have the same density and vibrate evenly. If one shoulder of a reed is denser than the other, they will vibrate at different frequencies resulting in an unbalanced reed that performs poorly.
There are several ways to determine if a reed is properly balanced. The first is to play the reed by twisting the mouthpiece at an angle that allows only one side of the reed to touch the bottom lip. This side of the reed will be muted, allowing only the other side to vibrate. When doing this, the saxophonist should listen carefully to the sound. Now the mouthpiece should be twisted in the opposite direction and played with the other side of the reed muted by the bottom lip. The saxophonist should then compare the tone produced by the two playings. If the tone is different, one side of the reed is denser than the other and the reed is unbalanced. The denser side of the reed is the one that needs to be adjusted and can be identified since it will vibrate at slower speed than the less dense side.
Another way to see if a reed is unbalanced is to visually inspect it by holding it up to a bright light. The saxophonist should examine both sides of the reed by looking to see how much light shines through each side of the reed. If light shines through one side of the reed more than another, the reed is unbalanced. The denser side of the reed is the one that should be adjusted and can be identified because it will not allow as much light to pass through as the less dense side.
To correct an unbalanced reed, the denser side of the reed should be sanded or shaved with a reed knife on the shoulder of the vamp. After removing a small portion of cane only on the densest side, the saxophonist should visually inspect the reed again and also test play it. Repeated sanding or shaving and test playing may be necessary to get the reed perfectly balanced.
Sometimes reeds will swell after being soaked in water or after being played for a period of time. The swelling occurs on the flat side of the reed and prevents the reed from lying flat against the mouthpiece table. As a result, the reed will not respond properly and should be adjusted. To correct the reed, the saxophonist should lightly sand or shave the reed in the swollen area to remove the excess cane. This will allow the reed to lie perfectly flat against the mouthpiece table correcting any response problems.
The Reed Sealing Test
A reed that is not sealing properly with the mouthpiece will have an adverse affect on saxophone tone and response. The reed sealing test is a way to check the reed, reed alignment and mouthpiece to make sure the reed is sealing properly. The reed sealing test checks for leaks in the reed itself and between the reed and mouthpiece.
To perform the test only the reed, ligature, mouthpiece and saxophone neck are needed. With these pieces assembled, the saxophonist should seal off the large end of the saxophone neck with the palm of the hand. Next, all of the air should be sucked out of the mouthpiece and neck at the other end creating a vacuum. This action should cause the tip of the reed to close and stick to the mouthpiece for several seconds. After that time, the reed should snap back to its normal position making an audible popping sound. If this happens, the reed is sealing properly with the mouthpiece.
If a vacuum cannot be created, the saxophonist should carefully examine the reed and mouthpiece because a leak has developed somewhere between the two. The first thing to inspect is the reed. If the reed is split, swollen or not properly aligned with the mouthpiece, the reed will not seal properly and should be adjusted or discarded.
If no problems are found with the reed, the mouthpiece should be examined for damage or to see if the table is warped. A way to check for a mouthpiece problem is to perform the reed sealing test with several other new reeds. If a vacuum cannot be established with any of these reeds, the mouthpiece is probably damaged or warped and will need to be replaced.
Summary
All saxophonists should be aware of reed preparation and adjustment strategies since they play an important role in performance. Properly preparing and adjusting reeds will definitely make a difference in how well saxophonists perform and also how confident they feel when performing. By utilizing these strategies, it is hoped that saxophonists will always have good reeds available allowing them to perform to their full potential.


