

There are several simple things band directors can teach to flute sections that will quickly produce measurable improvement in tone quality, technique and intonation. These tips can be used with beginning flutists, as well as flute sections in middle school and high school. How many times have you lamented that your flute section is extremely sharp and shrill in the high register? How many times have you reminded your flute section not to go flat on the diminuendos? Does your flute section have a breathy sound instead of a beautiful and focused sound? This article addresses these concerns and others with tips that every band director should know about flutes.
1. PRODUCING THE FIRST SOUNDS AND GETTING A BETTER SOUND
Start on the head joint only
When teaching beginners how to get their first sounds, it is beneficial to use the head joint only. This allows students to experience success without the awkwardness of holding the whole flute. Many important skills can be developed using the head joint, including starting notes (tonguing) and blowing with a strong air stream. Fun activities with the head joint include exploring the variety of sounds that can be produced, including glissandi (like trombones) and covering the open end with the palm to produce a low pitch. Students can also learn to play several scale-wise pitches by inserting their right index finger into the open end of the head joint which will allow them to play three note songs such as Hot Cross Buns and Mary Had a Little Lamb.
Placement of the lip plate
For good tone, the embouchure plate (or lip plate) should be placed just below the flare of the lower lip allowing 1/4 to 1/3 of the tone hole to be covered. The student should be able to feel the edge of the tone hole under the flare of their lower lip, which will help with placement. This position enables flexibility of the lower lip, which controls the angle of the air stream. Students with full lips having difficulty with sound production, can place the lip plate slightly higher directly on the lower lip. Traditional methods of placement such as “kissing” the tone hole and then rolling tend to place the lip plate too high for many players.
Fast air stream
Using a consistently strong fast air stream on all notes, both low and high, is required to develop a good tone. I like to use the analogy of using “birthday candle air”, i.e. the speed of air used to blow out birthday candles.
Forward tonguing
Teaching students to tongue as if they were “spitting a grain of rice off the tip of the tongue” is a method of tonguing that helps students blow a strong air stream through a small aperture. This type of tonguing produces tone that is strong and full without the usual “airy” sound that is produced when the air stream is too wide. This method of tonguing is sometimes called spit rice tonguing, Suzuki tonguing, forward tonguing or French tonguing. Its hallmark is tonguing slightly between the lips–sometimes it is helpful for students to think about touching the tip of their tongue to the top lip to start each note. When they do this successfully, there is a small “pop” sound as the air is released.
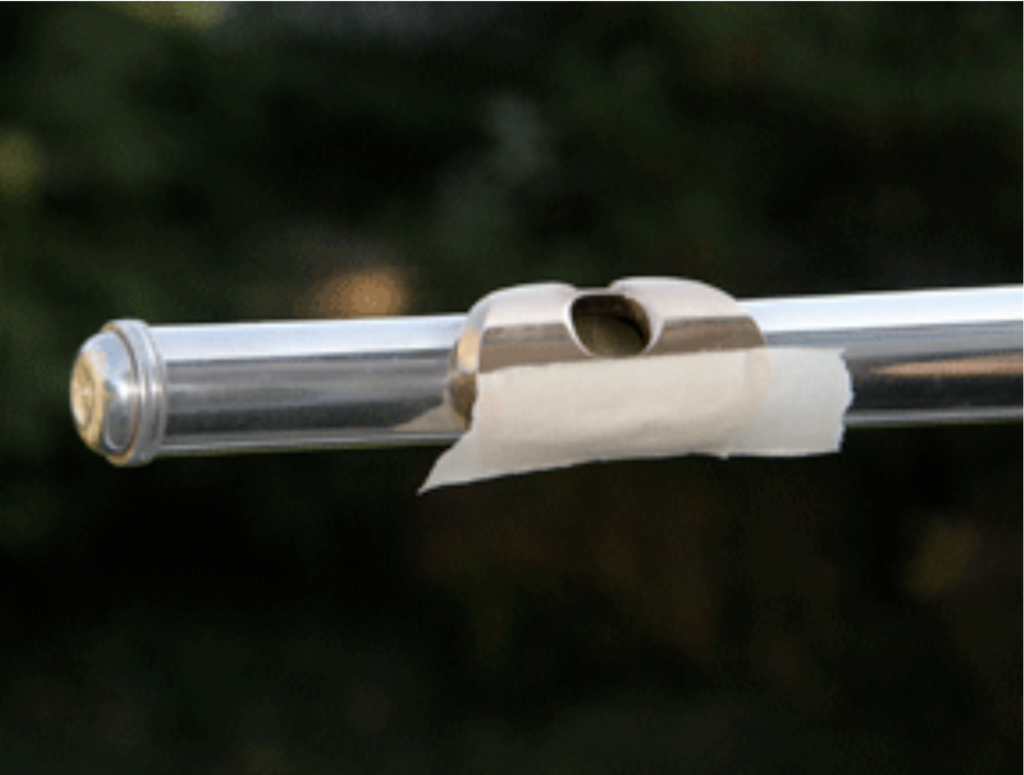
Most students will figure out ways to adjust after getting braces, but for students having difficulty getting a sound, there is something simple that can be done to help. Patricia George, flute pedagogue, recommends putting layers of masking tape on the part of the lip plate that rests against the chin. The idea is to build up layers to compensate for the changed blowing angle caused by the hardware on the teeth. Two layers of masking tape might help some students, while it may take up to six or more for other students. (See photo #1 below) After the number of layers is determined, the masking tape can be trimmed neatly with scissors to the shape of the lip plate.
2. PLAYING SECOND OCTAVE NOTES
Producing notes in the second octave is sometimes difficult for beginners. Since most of the first and second octave notes have the same fingering, students must learn to change the angle of the air stream with their lower lip to produce the higher octave. Have students start the high note with the syllable “pooh” (as in Winnie the Pooh). This will probably cause some giggles, but that’s part of the fun, and the silliness of the syllable will help them remember how to start the high notes. This syllable pushes the lower lip forward, raising the angle of the air stream to blow across the tone hole, rather than down into it. Remind the students to use strong “birthday candle” air, which they should already be using on their low notes.
3. RIGHT HAND POSITION
Arched fingers
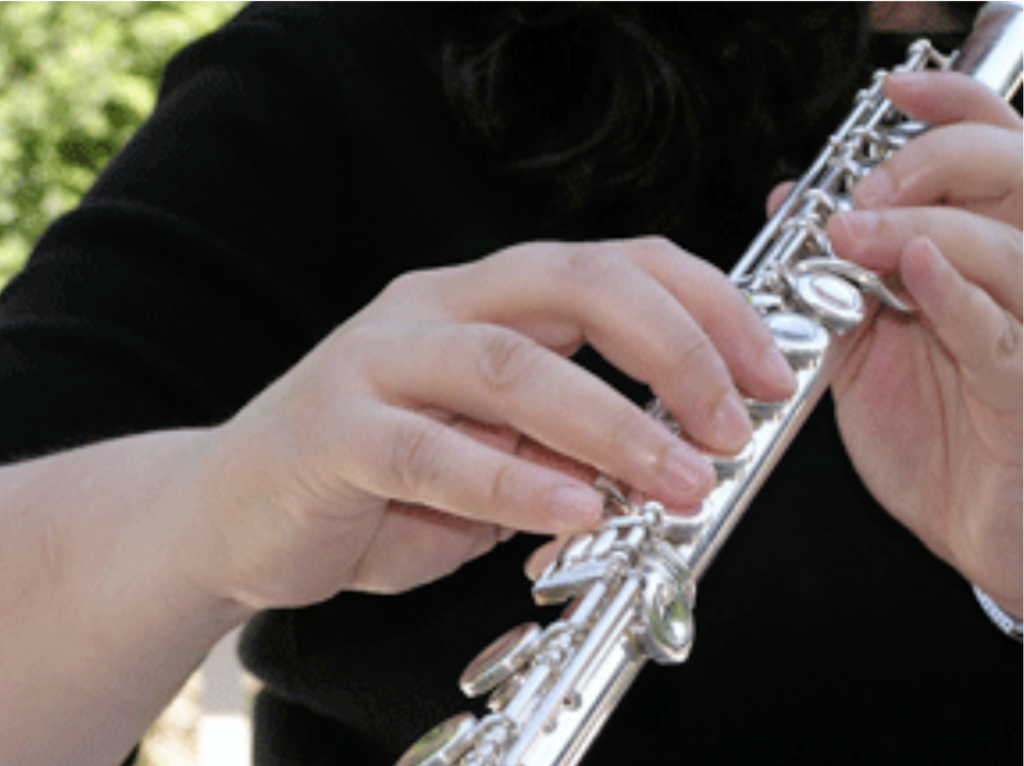
Not all hands are the same shape and size, so it is important to teach a hand position that maintains the natural shape of the hand as much as possible. Fingers of the right hand should be arched in a position natural to the shape of the hand rather than curved, so that the pads, rather than tips, of the fingers are on the keys. (See photo #2 below) This natural position will allow the students’ fingers to move more freely as they change from note to note.
The right thumb does not help hold up the flute
The right thumb does not need to be under the tube of the flute. Yes, you read that correctly: The right thumb does not help hold up the flute. The right thumb serves as an anchor for the fingers and a point for balancing the flute. Flutist and Oberlin Flute Professor Michel Debost describes this hand position as “pulling the book off the shelf”
(with the book laying sideways). (See photo #3 below) Many students tend to play with the right thumb too far forward cramping their fingers and hindering their technical facility with fast notes.
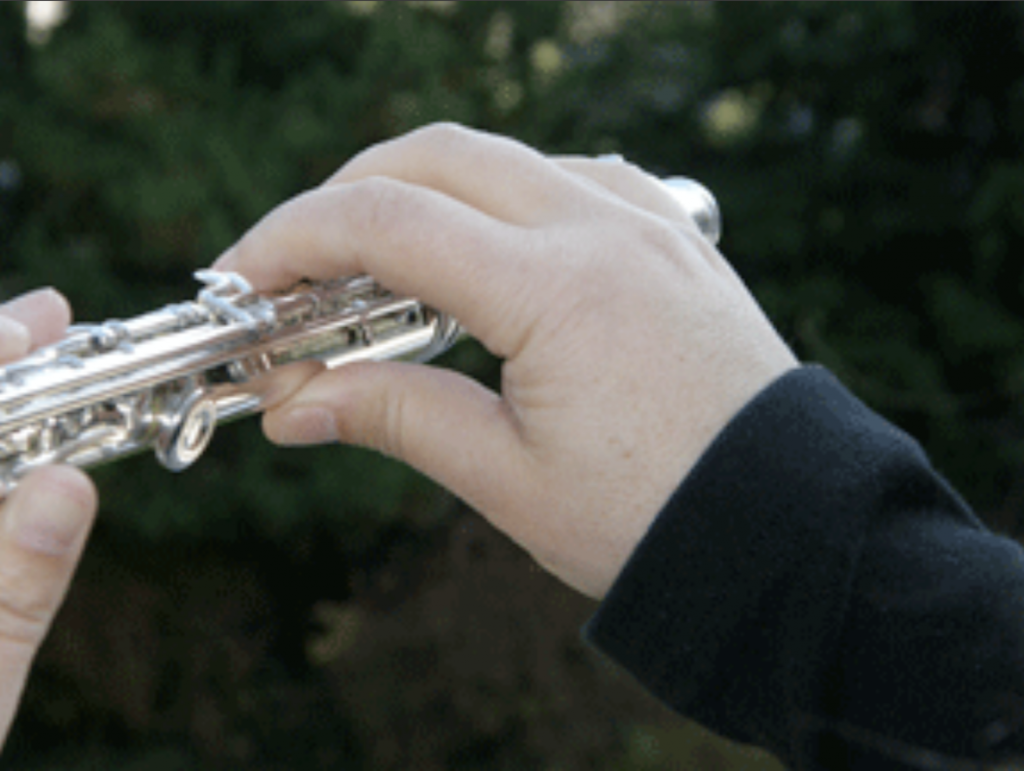
To find the optimum hand position for each individual, have students stand with their right arm relaxed and down at their sides. Without changing the shape of their hand, have the students lift and rotate their right forearm until it is parallel to the ground with the back of their hand facing the ceiling. Have them first place their fingers (ring, middle, and index) on the last three circle keys of the center joint of the flute, then bring the thumb up to the flute while maintaining the arch of the fingers. In most cases, the thumb will be placed on the side of the tube, rather than under it. This is good and should be encouraged (see photo #4 below), since the right thumb does not help hold up the flute.
Lateral position of right thumb
Laterally, the right thumb should be positioned under the index or middle finger or somewhere between, depending on the shape of the student’s hand. (See photo #4 above) To determine lateral placement of the right thumb on the flute, the student(s) should pick up a soda can (with their right hand) as if they were going to take a drink, checking the position of the thumb relative to the index and middle fingers. This position will be the most ergonomically correct for the shape of their hand.
It is best to encourage that the thumb be kept as straight as possible (not bent at the joint) and to discourage “hitchhiker’s thumb” where the thumb is stretched to the left of the fingers along the tube.
4. BALANCING THE FLUTE
Rather than teaching students how to hold the flute, flute pedagogue Patricia George advocates teaching them how to balance the flute. The most important support and balance point is the left index finger. This finger holds the flute up and pushes toward the flutist’s chin. The right thumb, when positioned on the side of the tube, helps balance and stabilize the flute by pushing it away from the player and serving as a counterbalance to the left index finger. This counterbalance stabilizes the flute so that it won’t roll toward the player when lifting the thumb key for notes such as C.
Beginning flute students often learn C and D as two of the first notes in their Band Method. This necessitates switching from fingering with two fingers (C2) to almost all the rest of their fingers (D2) which is very awkward. Having the flute well-balanced will keep it from rolling toward the player when fingers are lifted from the keys to play C2.
5. MUSIC STANDS
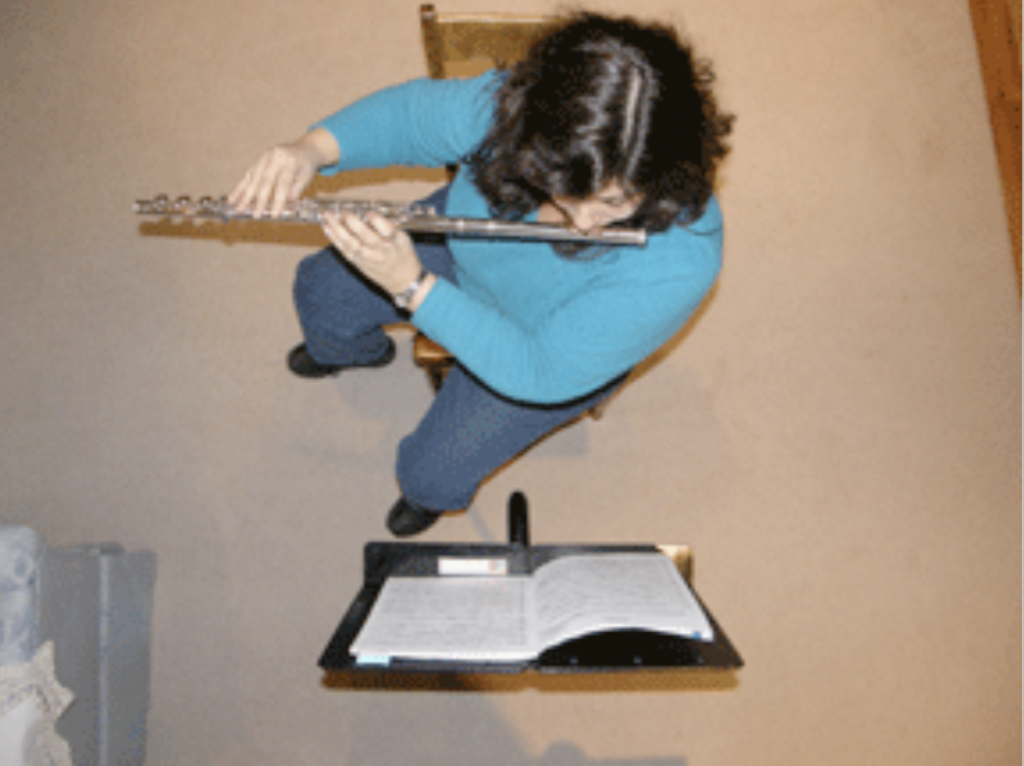
Because of the asymmetrical playing position of flutes, reading music from a music stand presents special challenges. If at all possible, each flute student should have their own music stand, as well as ample lateral space between chairs in the flute section. Flute students should face their music stand and then turn their body and/or their chair 45 degrees (1/4 turn) to the right. Their body should remain properly aligned with shoulders above hips rather than twisting at the waist. If they lift their left elbow, it will be pointing directly at the music. (See photo #5 below.)


