

It is now time to add the fourth and final member of the “Fantastic Four” (the “4 D’s”) the fastest of our timeline velocities, the “dits”. After your young musicians have worked with their thumb motions with the “1, 2, and 3” of “digit” counting, the same motions are used, but now we say “1, &, 2, &, 3, &” subdividing each “digit” in half. It is important to be sure that the thumb “freezes” in each of the number positions to clearly differentiate it from timelines in the “duple” meter. In the second exercise in section “D,” the “pulse” (quarter note) or down arrow is added.
Several of your students may anticipate and come in early on the following downbeat. This is common and even though it seems it would be one of the easiest of tasks, it will be one that may constantly need to be commented on and corrected. In lines three and four we introduce intermixing the “duple” and “triple” meters now adding our fourth and final participant, the “dits”.
Now, one problem you might find with “dits” is that “1, &, 2, &, 3, &” can be a bit of a “tongue twister” for your 6th graders. They need to know the subdivision relationship between the “digits” and “dits”, but I take them off pretty quickly and teach them a “phonetic” version of the “dit” timeline. Ironically enough, it is exactly the technique many of us (eventually) teach when we need to increase the speed of our students to articulate notes, “double tonguing”. On each “digit,” the child says the syllable “di” and on each “digit” subdivision they use the “gi” syllable (saying; “Di, gi, di, gi, di, gi”.) Phonetically, it sounds more like the old “70’s” expression “Can you DIG IT?” Not that you will be using “double tonguing” anytime soon, but it does not hurt to start early. After doing these drills for a while (playing the game), you will find the student tonguing coordination will develop faster, so when needed, many of your students will easily be ready.
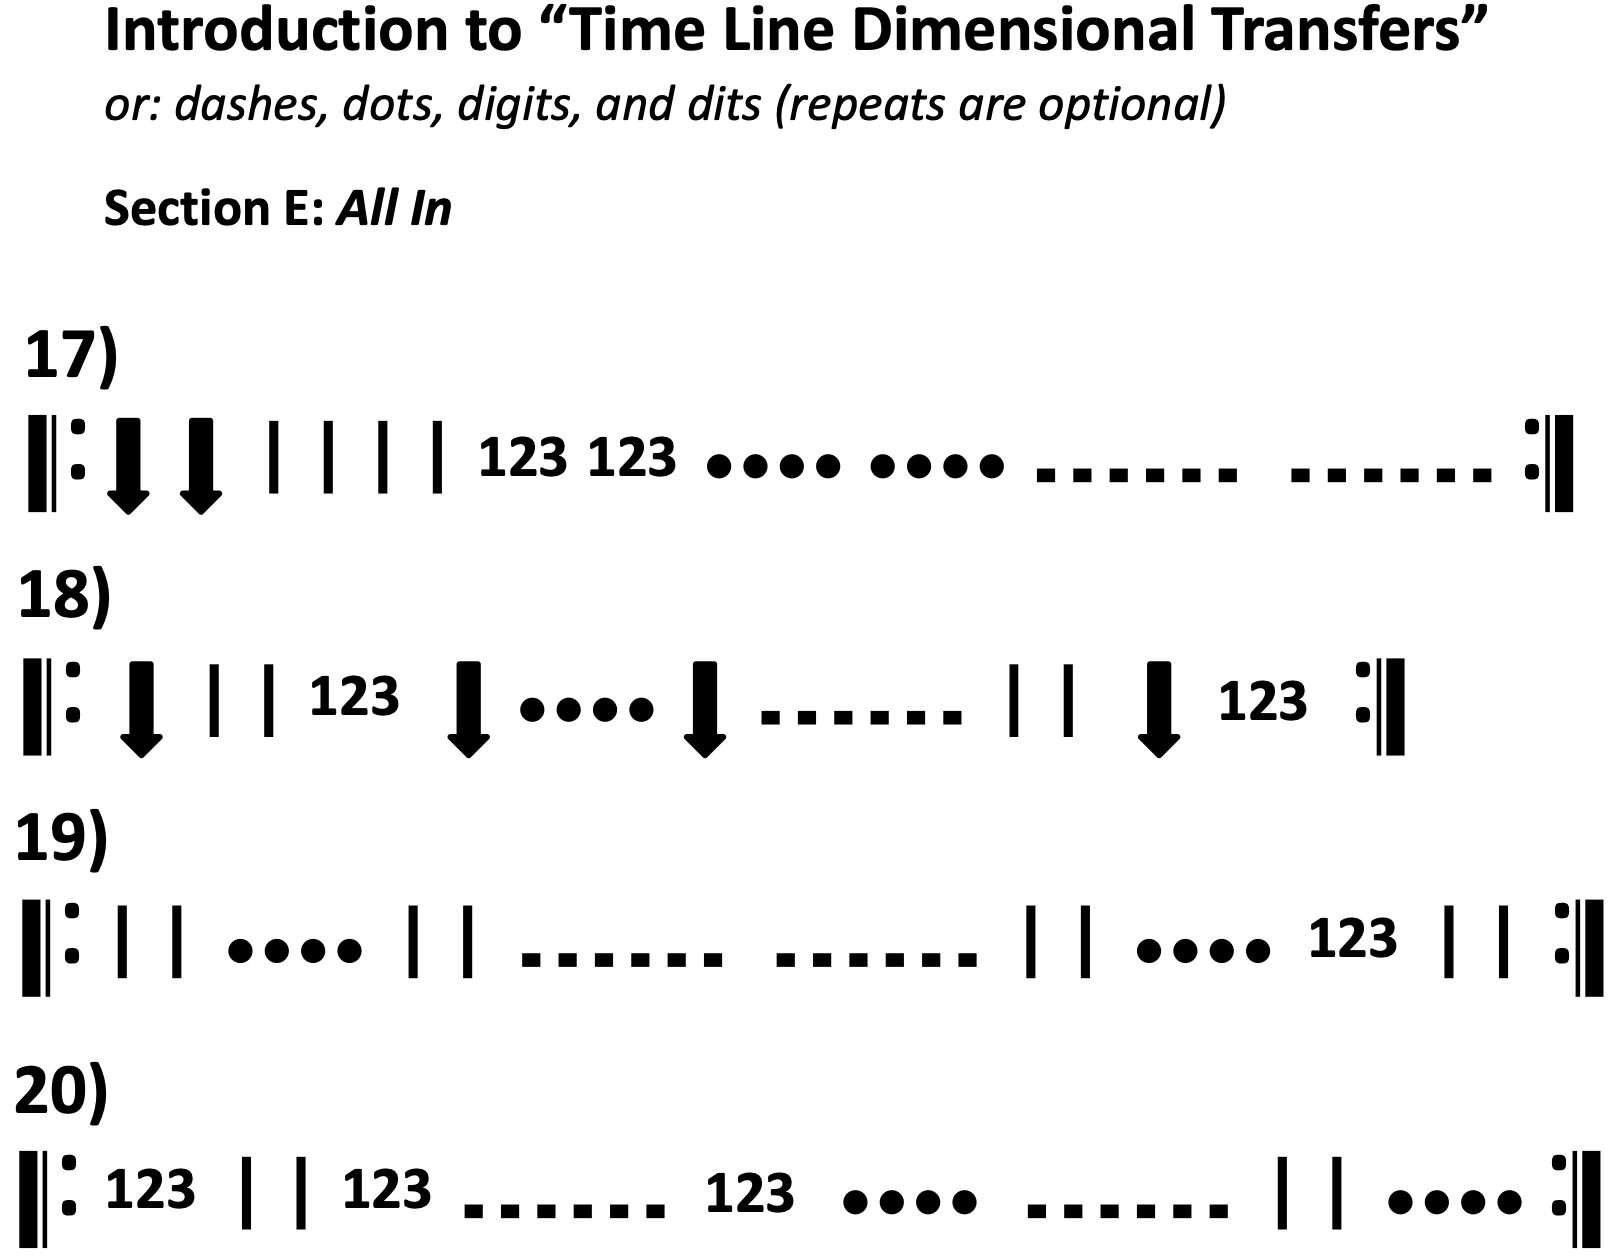
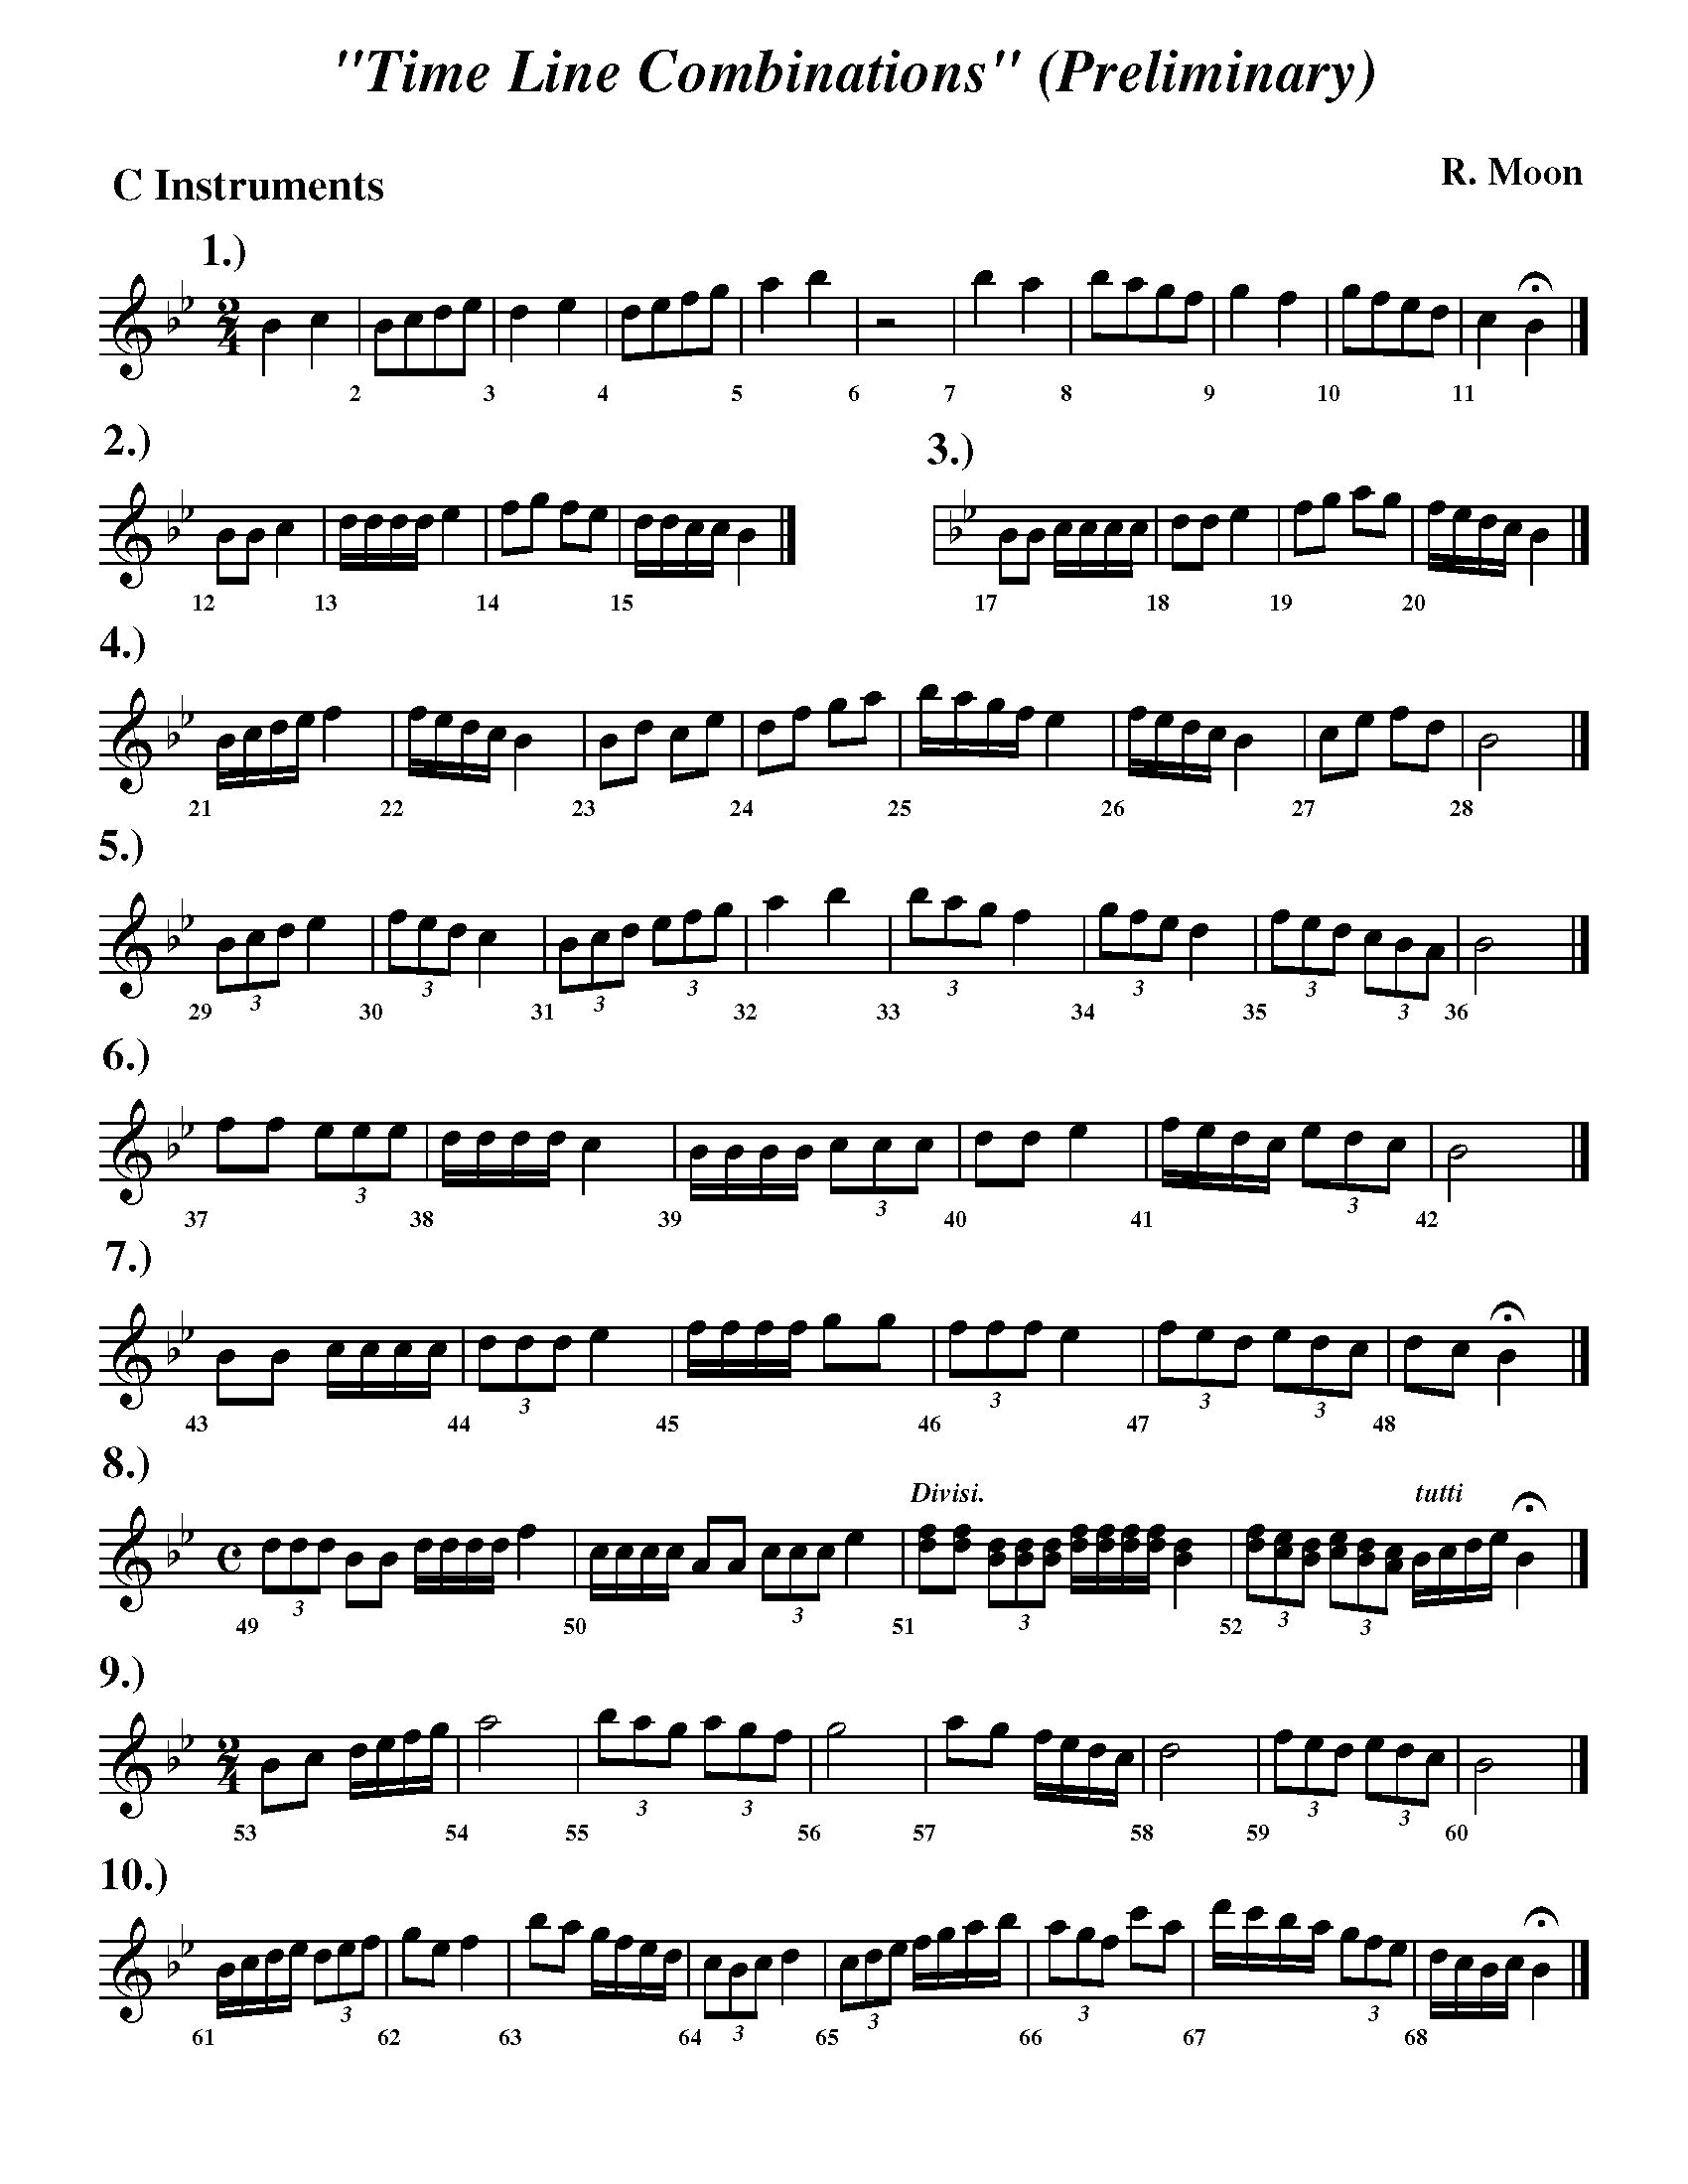
Section “E”, (“All In”) presents the final “tricky” challenge, which is interacting the “dots” with the “dits”. “E” might also be a double session as well, but I have had classes get comfortable transferring back and forth between these two timeline velocities by the time they got through exercise #4. So, “Now what?” Great, we finished the “Time Line Dimensional Transfers” page, so what do we do next? One possibility is to apply (using music notation) exactly what we have been working on (see “Time Line Combinations (Preliminary)” below). The range stays under concert “Bb” (except for exercise #10) and offers the same timeline transfer challenges that your students did verbally, using symbols on the introduction page. I start things off diatonically, switching directions on occasion, so the students have to READ! And cannot predict what note will come next. Later, I introduce “skips” to continue challenging your students if they are ready. There are two additional “application” sheets using music notation in the series, each one increasing in challenge level. The next level I completed was with “some” middle school students, and the final set was definitely for high school. However, even getting most of the way through this “Preliminary” page at the end of your student’s 6th grade year is still quite an accomplishment. I suggest you still keep these sessions short, one line at a time is fine doing “double sessions” as needed.
The second possible direction you might go after the “introduction” page I am going to save as a surprise for the next time we meet. We will continue using our motions (adding a few) along with “verbalizing” our rhythms. Also, it will contain new and additional strategies in rhythm reading for areas that continue to challenge our young band musicians. See you then.


")