
Preparation
It is my basic assumption that you will be teaching this concept to several elementary (or at least beginning) students at one time. I also assume that, even though you have undoubtedly taken a brass methods class or some preparatory course sometime in the past, right now you have a trumpet (in its case) in front of you and that you will follow along step by step to carefully learn this concept.
ASSEMBLY
With the exception of the mouthpiece, the trumpet is, of course, completely assembled as it appears in the case. This one minor assembly job can, however, cause some problems if the beginner is not properly instructed. So…be sure to explain and demonstrate that the mouthpiece shank should be inserted into the lead pipe with a gentle twisting motion. This will create a firm connection which will prevent the mouthpiece from falling out. Be certain that the students understand that they are not the strike the mouthpiece with the hand in an attempt to seat it, for even a light tap can cause it to become stuck and require the use of a mouthpiece puller.
VALVES
Though the problem of misplaced valves is somewhat unlikely during the first lesson, it is important to make students aware of the fact that the valves must be placed in the correct casing in order for air to pass through the horn. Since each valve is stamped with the number corresponding to the casing in which it belongs, the beginning student should easily learn how to recognize the valve identification. Explain that #1 belongs in the casing nearest the mouthpiece; the others follow in order.
It is also important to point out the valve guide (the protrusion on the valve) and that it must be turned to engage within the casing. (The valve cannot be twisted once properly inserted into the casing.)
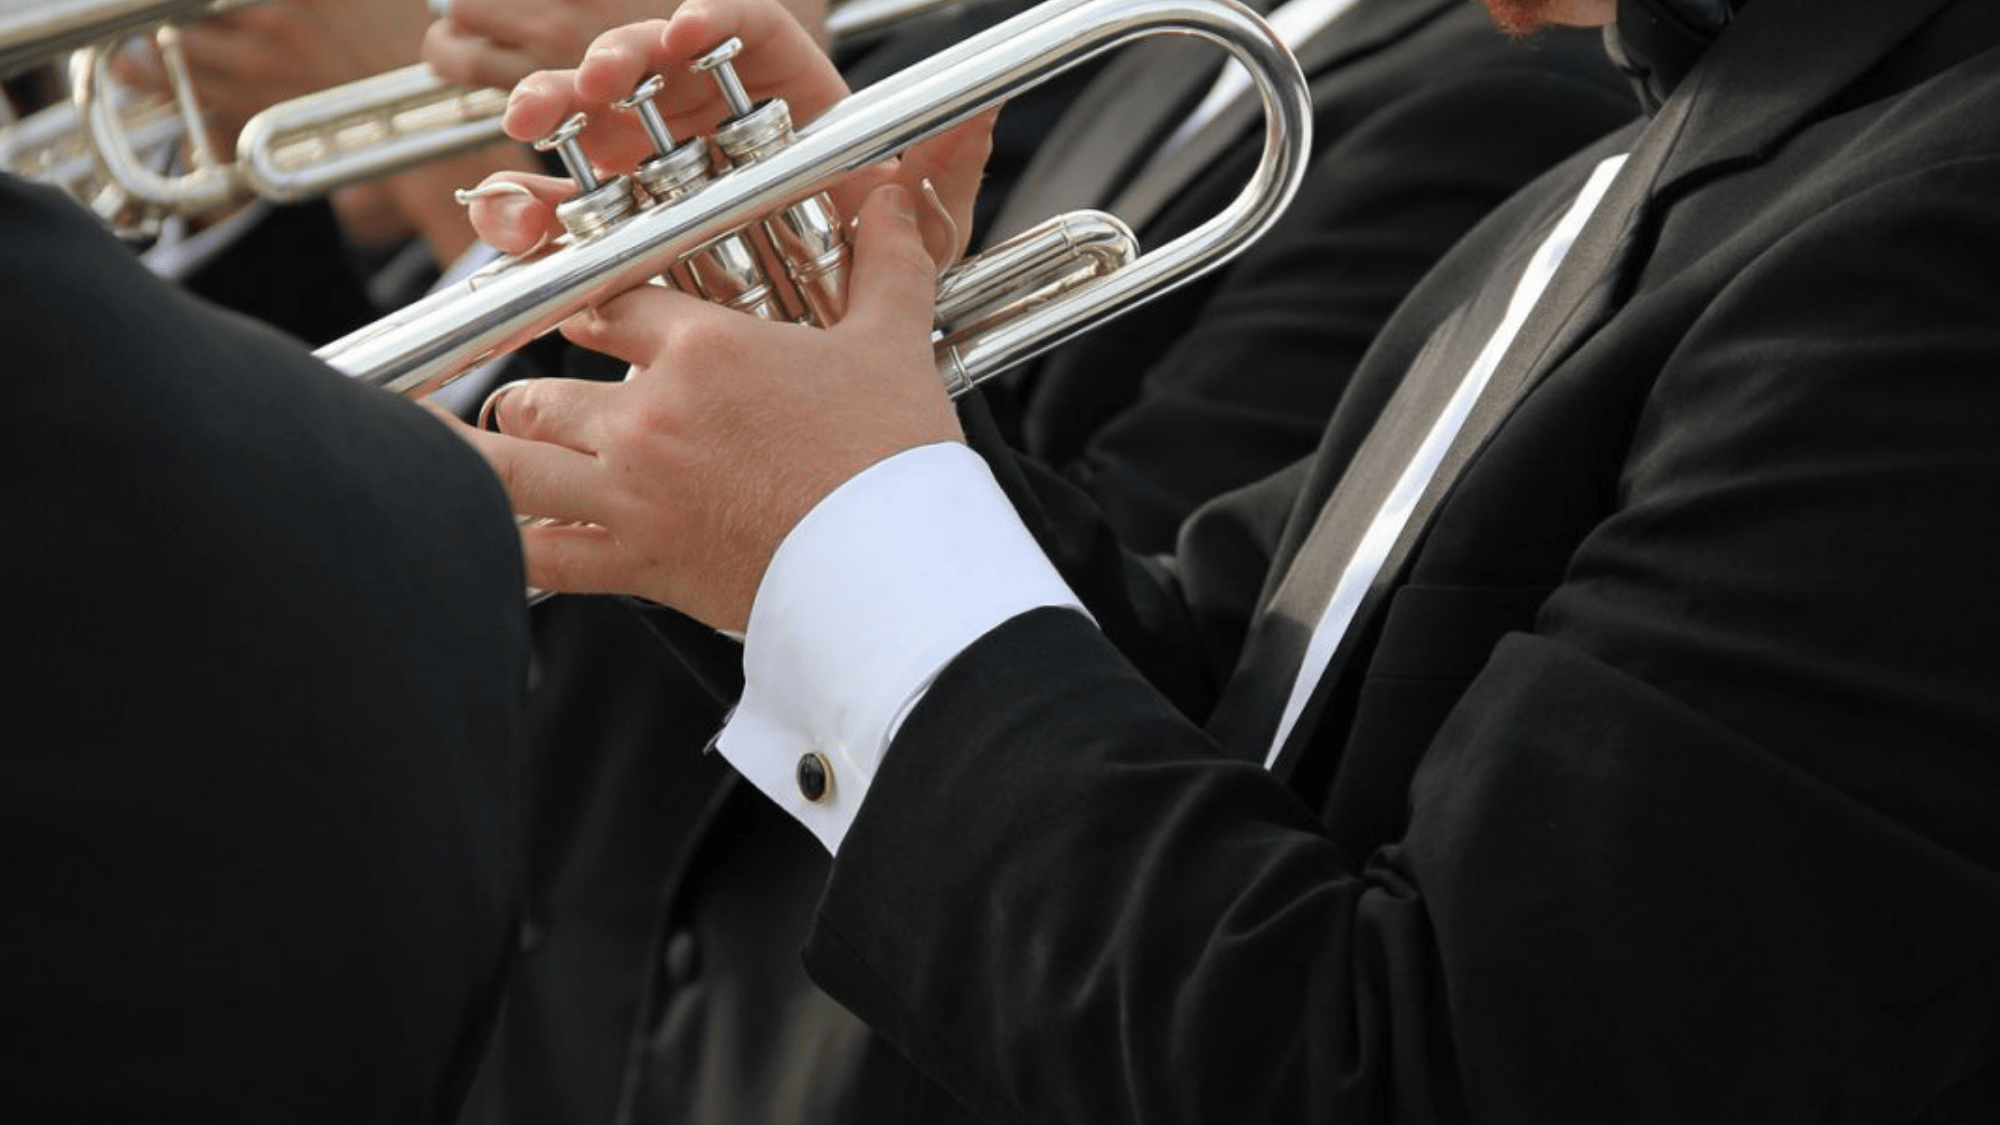
HAND PLACEMENT: HOLDING THE TRUMPET
Now instruct the student to grasp the instrument by the valve casings with his left hand, pointing out that only a firm grasp is required. Certainly, anything that can be done in beginning stages to eliminate the possibility of tension building is to be encouraged. All too frequently a student grips the instrument so hard that tension builds up throughout the body, thereby creating numerous other problems.
To develop a proper right-hand position, bring a tennis ball (or water glass) to class, or at least ask the students to imagine they are gripping tennis balls. The concept of gently rounded fingers forms an excellent posture for playing the trumpet. The one common mistake which students make is the continuous use of the little finger hook on the lead pipes. Be sure to point out that this hook is to be used as a means of supporting the trumpet only while turning pages with the left hand. (Posing the little finger on top of the hook is a common practice. Though the loss of finger dexterity is an obvious reason for not using the hook, the most important immediate reason is that the little finger can easily be utilized to exert excessive pressure against the embouchure, thereby destroying it.)
So, the thoughts to remember in holding the instrument are:
-
- Secure, relaxed left-hand grip.
- Curved right-hand fingers.
- No little finger hook.
BREATH SUPPORT
Chances are, you already have your own method of teaching breath support. Chances are it matches up perfectly with breath support practices in trumpet playing. So, this will be quite abbreviated. Also, too much can often be made of proper breathing—to the point where all sorts of unnatural physical things start to happen.
If you stress: sit tall, full breath, fast air… in your own words, of course, that’s enough. Be sure that the student is not slumped forward, that he takes a breath similar to a big sigh, and that he understands that the air is to be expelled as though trying to blow out candles. When you stop to think about it, if you are sure the student is sitting correctly, getting him to take a deep breath is simple: he’s been doing it all of his life. The only unfamiliar part is air intensity. Even that is easy when you say:
THE BUZZ
Unlike the woodwinds where the reed produces vibration, the lip itself must produce this vibration on brass instruments. And though this form of producing tone is not difficult, it must be remembered that the lips of the beginner are not accustomed to vibration and will feel strange the first few times. It is the point at which a student needs the most encouragement to produce tone correctly; it is the point at which so many bad habits are established, simply because the student wants so badly to be successful in just making a sound on the trumpet. Your encouragement for him to take a completely natural approach toward playing the instrument will automatically forestall most of these bad habits.
FORMING THE EMBOUCHURE
With the trumpet lying on the student’s lap, ask him to practice the sigh breath. Be sure to listen closely to each student so that you can detect any restriction in the airflow. When this occurs, you will hear a low hissing sound in the throat; asking him to look up and yawn will immediately eliminate the restriction. The student should feel as if the throat is cold from the air. Have the student say, “HO—“, when exhaling from the sigh.
Once you are sure that each student can produce a clear open sigh, instruct the students to say the word “banana”. Have him or her repeat the word a few times and then listen to each student pronounce the word so that you can be sure that there is a strong consonant sound to the “B”. (It is the start of the syllable “buh” that we are interested in.) This will take only a few moments with each student, but it is very important in the initial formation of the embouchure.
Now instruct the students to just form the lips in a “B” without saying “banana”. If done properly, the lips will be together naturally–not tight, not limp, but very supple. Understand that each player will have his or her own facial characteristics and each will look different. Tell them not to make faces. From here it is a very simple task to have the students “sigh through the ‘B’. I ask my students to “sigh through a banana”. They think its funny, but it works. The important thing is that there must be no restriction in the throat and that the lips must remain in the “B” shape as the air is expelled.
THE FIRST TONE
The next step is to couple the embouchure formation with the instrument. Be sure that the student uses the same lip formation when he brings the instrument to playing position as he did without it. Also mention, (only if necessary) that the mouthpiece should be placed comfortably on the lips and somewhat centered. Again, each player looks different.
Contrary to most beginning methods, I believe that first space F (concert Eb) is the best starting note on the trumpet. This note responds much quicker than the traditional open G approach and is probably the easiest note to play on the trumpet. So…with first valve down, have the students “sigh through a banana into the horn,” making certain that the lips remain in the “B” position. Demonstration with your own trumpet will help “put the sound in the students’ ears.”
I have mentioned nothing about wetting the lips, as most students will do this anyway. However, if a student does not wet his lips and seems to have difficulty making a vibration, suggest to him that he lick his lips and even the inside of the mouthpiece.
#1–CORRECT RESULT More often than not, a reasonable tone will be produced if you have carefully introduced the embouchure formation. In addition, the student will automatically attempt an imitation of your tone and pitch. When it happens, it should sound like this:
#2–NO TONE, RUSHING AIR In this instance, there are four possible causes
b. Too much pucker in the lips (‘oo’ shape).
c. Dry lips, dry mouthpiece.
d. Insufficient air to make lips vibrate.
REMEDY: Re-forming and maintaining the “B” lip formation will eliminate the possibility of spread aperture (lips not together) and also the problem of too much pucker (or ‘oo’ shape). Dry lips and dry mouthpiece can easily be eliminated by specifying that the student is to lick his lips and also the inside of the mouthpiece. The problem of insufficient air to make the lips vibrate can best be handled by reviewing the “sigh” breath and even suggesting that the air move faster.
Since the sound produced in this instance is air only, you should be able to narrow the possible cause in this fashion: Be sure the student licks his lips; then listen to the speed and force of the “rushing air” sound…if it is weak, the probable cause is insufficient air…if it is strong, the probable cause is in the lip formation.
#3–AIRY TONE This sound:
is one step above #2; the tone is now evident as an actual pitch but the same basic problems exist. In this case, however, it is less likely that dry lips or insufficient air will be responsible for the sound. Most often the causes will be
b. Too much pucker in the lips (‘oo’ shape).
#4-TIGHT, THIN TONE The pinched tone quality:
is invariably produced as a result of tenseness. In addition to more localized tension, the entire body often plays a significant role in this area. Specifically speaking the three common causes are:
b. Too much pucker in the lips (hard ‘oo’).
c. Tight, closed throat.REMEDY: Work with the student to be sure he is relaxed and then returns to re-formation of “B” but with less exaggeration so that the lips do not bite, pinch, pucker, or excessively purse together.
#5-COMPLETELY STOPPED This possibility is a severe exaggeration of #4. No tone of any kind occurs due to:
a. Tense, excessively pursed lip formation.
b. Mouthpiece pressure toward lips.
c. Closed throat.When a closed throat is the cause, tension in the neck muscles is often visibly evident. Sometimes the tension is even audible:
REMEDY: If you suspect a “closed throat”, review the sigh breath as a means of opening the throat and also relaxing the entire body. Also review the “B” lip position and emphasize less exaggeration of the formation. Then, as the student plays, watch carefully to be sure that excessive mouthpiece pressure against the lips is not the cause (No finger hook).
PUFFED CHEEKS
Though there have been a few successful performers who puff their cheeks, there is little doubt that allowing the cheeks to puff out greatly increases the likelihood of problems. Specifically, puffed cheeks can cause numerous problems relative to pitch, control, and endurance. If discouraged from the first lesson, the puffed-cheeks syndrome should be very easy to eliminate. Use of a mirror can be a significant aid in helping the student who has been playing for some time and has this problem.
MOUTHPIECE SIZE
Mouthpiece selection is, of course, important for each student as an individual. And though it is true that new student-line trumpets come with a mid-range mouthpiece suitable for the average beginner, real problems often occur when “Johnny” brings in “Uncle Herman’s twenty-year-old trumpet with the super-duper, screech-range mouthpiece.” The cup diameter and depth of that highly specialized mouthpiece will directly affect tone, response, etc.
The more shallow the cup, the brighter the tone and the sharper the pitch in the upper range. The larger the cup diameter, the bigger the possible tone. That is not to say, of course, that every player should choose a large mouthpiece; in fact, beginners should normally begin on a mid-size mouthpiece (e.g. Bach 6 or 7). Regardless of the choice, the teacher should check and even test any questionable mouthpiece. It is, after all, extremely important to ensure the best possible conditions for the beginning student.
INTONATION
Every student can and must play in tune from the very beginning! “Theories” which expound that “learning to blow” is the only important aspect in the beginning stages are ridiculous. As soon as a note is introduced, there must be instruction, which produces correct tone quality. Since out of tune notes seldom contain proper tone quality, it follows that attention to one cures the other. Note in the following examples the natural tendency of the trumpet to play flat or sharp and with tone quality, which is inconsistent with surrounding notes:
#6-LOW D: Natural sharpness & thinness; then corrected.
(Also true of low C#). Correct both of these with use of the trigger mechanism (or ring) by lengthening third valve tubing and opening throat to more “oh” shape.
#7-TOP SPACE E: Natural flatness; then corrected.
In this instance, the correction is executed by lipping up the note. Students will eventually learn how to “lip a note” but initially, they fail to recognize the degree of flatness of top space E. (Also true of fourth line D.) Therefore, use this excellent method of making them aware of top space E flatness: Ask each student to play the note with the normal fingering (open) and then produce the same note using first-second-third valve combination.
The immediate result is that the student recognizes just how flat the natural tendency of top space E really is. Though you would not generally ask students to use this alternate fingering, it is a very useful, in-tune possibility. Furthermore, it will aid the students in better understanding how to “lip up” a note; when they return to the open E fingering, they will automatically adjust pitch upward.
#8-HIGH A: Pinched sharpness; then corrected.
The high register of the trumpet is not really much out of tune in the sense of natural tendencies, but the tendency of most students is to pinch these notes quite sharp:
To aid the student in hearing pitch, which is closer, ask him to play a high A using third valve instead of the normal first and second. The pitch will be lower and from a comparative standpoint will encourage him to reduce pinching in an attempt to match pitch. From an ear standpoint, I would recommend making the student aware of the tone quality difference in the high range as compared to the middle range. If the student attempts to match the tone quality of the middle range while playing in the high register, he will automatically play with better intonation.
Vol 1, #2, p.16 (Nov-Dec 1985)
Purchase Complete Embou-Sure Series


