How do I create my own tests with Ultimate Pursuit?
ABC candidates can create their own practice tests with the use of the new "Quick Test Generator."
Login to Ultimate Pursuit and follow steps below to create you own practice tests:
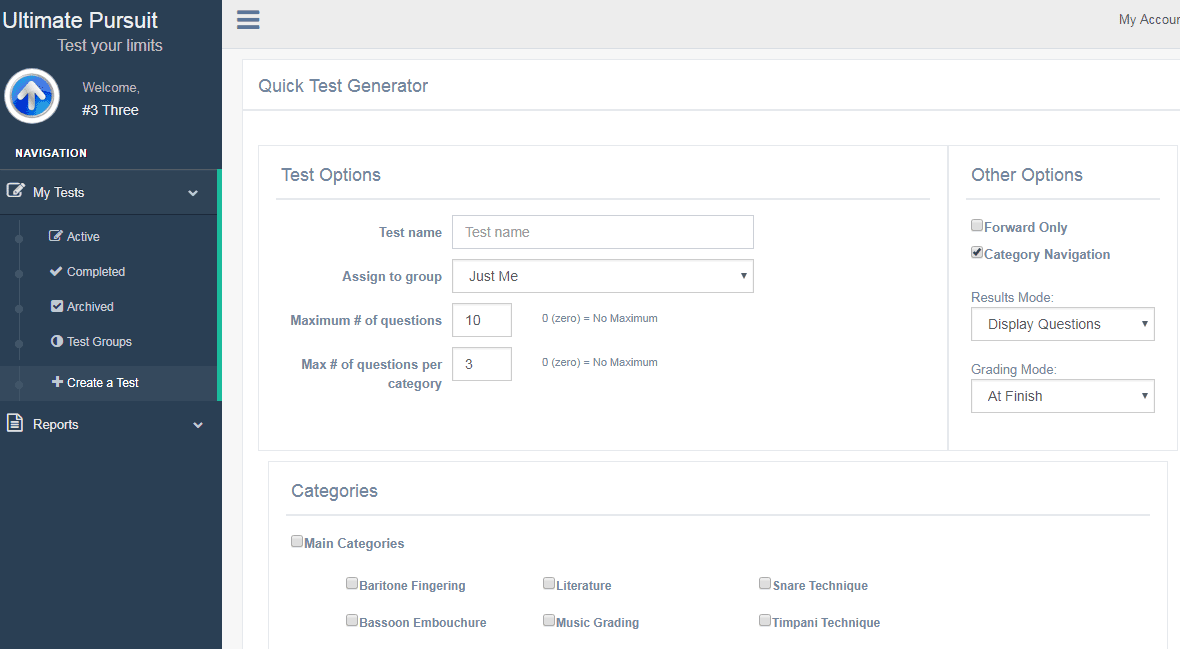
1. Click on + Create a New Test (pictured below).

2. Quick Test Generator Options
- Test name (enter a name for this test)
- Assign to group: Select Just Me to assign the question only to you. (CLICK HERE for more info about test groups - optional.)
- Maximum # of questions: Type in the maximum number of questions for your test.
- Maximum # of questions per category: Type in the maximum number of questions per category (see
categories below).
- Categories: Select one or more categories for this test. For example,
if you check Clarinet fingering and Flute fingering, the test will include
questions from those two categories.

3. Other Options (pictured above right)
- Forward Only: If you select this option, you can only move forward in the test. You can not go back and review your answers before you submit your test.
- Category Navigation : If you select this option, you will see a list of test categories in the upper right of your test screen
(when taking the test). You can click on these different categories to move from test area to test area.
- Results Mode: (after finishing your test)
- Display Questions will show you each question result (correct or incorrect). You can click on the question to get feedback on each question and your answer.
- Summary by Category will only show you the number correct and percentage in each test area. You will not know which question was correct and which was incorrect. You can not see the feedback for each question with this mode.
- Both will give you a combination of both Display Questions and Summary by Category.
- Grading Mode:
- Instant will show you the result for each question after you answer it (click the next or previous question arrow).
- At Finish will give you the results to your entire test after you click on the "Save and Finish" button (upper left of test screen).
4. Once you have your test set-up the way you want it, click on Generate Test at the bottom of the screen.
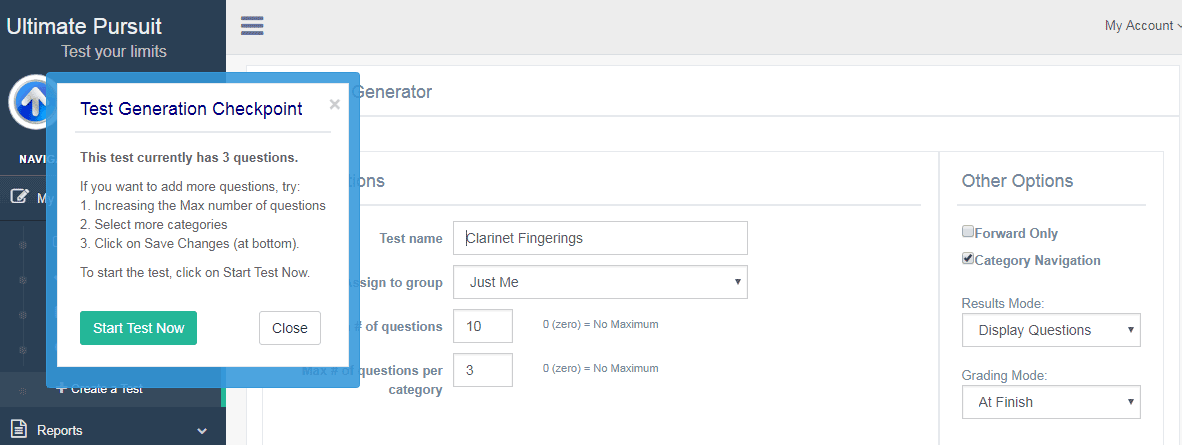
The Test Generation Checkpoint dialog will appear
(pictured below). If you are happy with the number of questions on the test, click on Start Test Now.
If you want to change any of the information on the test or add more questions, follow the instructions in the dialog. Click Save Changes at bottom and repeat until satisfied with the number of questions, and then click Start Test Now.

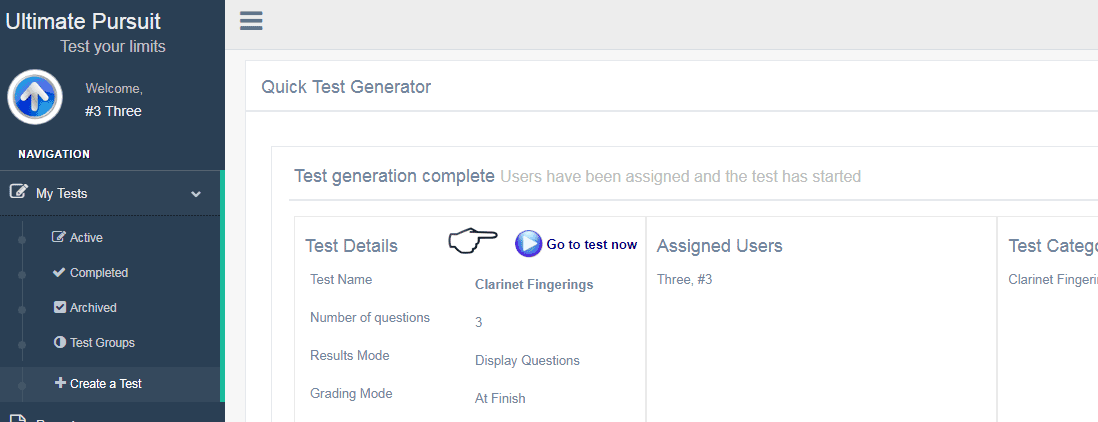
5. After you click on Start Test Now, the Test Generation Complete screen will appear (pictured below).
This screen shows a summary of the test. Click on Go to test now to take your test.
Note that your test will also be listed in the Active tests on the UP Central screen. These tests are not timed, so you can start and finish your test whenever you like.
